
 Join Us
  Join Us
The braking system in a motorbike, as in other vehicles, is the most powerful element available on the bike and can prevent an accident when riding. It is, therefore, essential that we keep them in good condition to be able to ride safely. At Box Repsol, we are going to give you a series of tips and instructions to always have them in tip-top shape so that you can ride with total safety and confidence in your braking system.
Know the elements of a motorbike braking system
The first thing that you should know are the elements that make up the whole braking system, from the levers or the pedal, to the pump, the fluid reservoir, the brake light switch, the hoses, the calipers with their pistons, the pads, and the discs which do the final braking work. In the event that our motorbike has drum brakes, we will find, as well as the latter, the shoes mounted on its interior and, in some cases, a system that uses rods to operate the brakes.
Checking the brakes of a motorbike
The first step, like almost always, is a visual inspection of the exterior elements of the system. Take a look to check for any error that could result in not being able to brake properly. It is advisable to carry out this operation a minimum every three months, although it’s ideal to check every time we go out on our motorbike, especially if it is kept outside overnight.

Brake discs
The brake discs have a minimum thickness, so it is important to check their wear level. Their thickness will be the indicator of whether we have to change them, since, if we ride with very worn-out discs, we run the risk of cracks appearing or, in extreme cases, they can break completely and create a very good possibility of having an accident.
If we don’t have the manufacturer’s information, or we don’t have an appropriate tool to measure the thickness of the discs, we can always observe their edge, as it is here where the wear becomes evident. If the existing margin between said edge and the rubbing surface is very striking, we advise that you go to a garage to check it.
Discs have a very high useful life. In many cases they can surpass 50 000 km, but their durability depends, in the majority of cases, on the type of driving, the brake usage, as well as the quality of the pads that we use.
If you think you’re capable of doing it, the procedure to change discs is simple, but requires the motorbike wheel to be removed. After that, it will only be necessary to loosen the screws that join it to the rim, place the new one, and screw it to its corresponding torque. We recommend you tighten the screws in a criss-cross (star) pattern, so that the disc surface sits flush.
Brake pads
The brake pads are the element that suffers the most wear in our braking system, as they are in charge of transmitting the force that we exert from the lever to the surface of the disc. Their deterioration can be severe and they have a useful life of between 10 000 and 20 000 km, depending on the use and type of pad.

It is usually easy to check them, as you can do so through an opening in the caliper or from one of the sides. When there is little friction material left, some 2 mm of thickness, you might want to think about changing them to prevent the metal plate from rubbing against the disc.
The replacement is usually very easy: it’s enough to loosen the bolts that join the caliper to the fork or swingarm. But don’t touch the brake lever with the loose caliper! We will then life the piston or pistons up to the inside of the caliper. For that we will use a specific tool or a wide flat-head screwdriver, with which we will put pressure on the old pads. We will loosen the pin, bolts, or metal strip (according to your type of caliper), which is usually situated on the outside of the pads, and we will remove them. We will place the new pads, and we will assemble in reverse order to how we have disassembled everything, finishing by mounting the caliper back in its place. If your caliper is floating, remember to clean and grease the screws where it slides. It is important to tighten the bolts to their corresponding torque.
When you have finished, pump the lever or pedal several times to sit the pads against the disc, and don’t forget that these require a few kilometres of bedding-in to operate at maximum performance.
Brake fluid
The purpose of brake fluid is to transfer the force that we exert on the pump to the brake caliper pistons which, in turn, will push the pads against the disc.
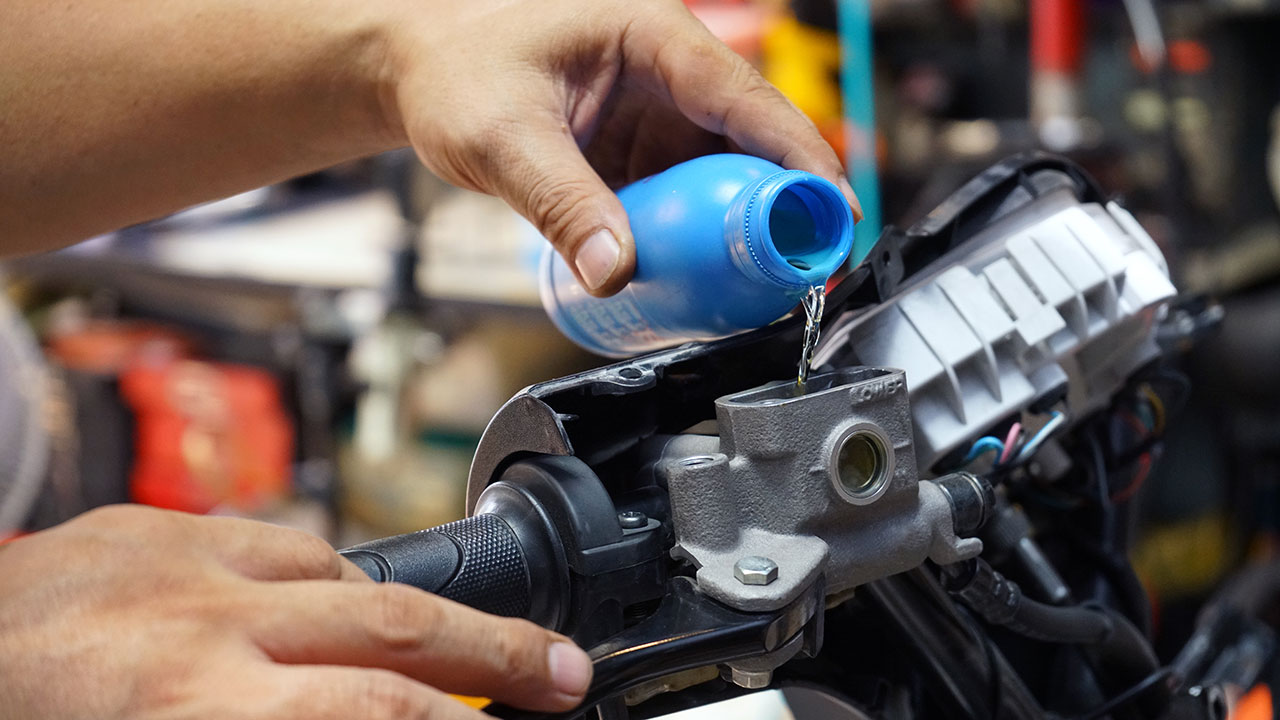
This fluid is hygroscopic, i.e it tends to absorb moisture. It is for that reason that, with time, it loses efficiency and its boiling point lowers. This can lead to loss of braking power during heavy braking, as the fluid can boil, resulting in the appearance of bubbles in the circuit. Furthermore, the water contained can end up corroding the interior of the brake circuit, affecting other parts of the system such as the pump and pistons.
They should be replaced every two years and special care must be taken not to spill fluid on parts of the fairing or painted elements, as it is very corrosive. To carry out the operation, the whole system must be bled to prevent air bubbles remaining in the system. If you don’t know how to do it, best go to a garage.
Brake calipers
Brake calipers contain pistons that push the pads against the disc by increasing the pressure of the brake fluid inside.

There are two types based on their operation: floating calipers, which have a piston or pistons at only one of its sides, and fixed calipers, which have one or more pistons facing each other on each side.
Furthermore, depending on the way it is mounted, we differentiate between axial calipers, with the mounting bolts parallel to the axle, and radial ones, which carry the bolts in the direction of the axle.
Normally, their durability is very high and they hardly require maintenance. When we change pads, we must simply make sure to screw them correctly and to clean both the guides and the pins.

If the caliper seizes, it will probably be because of a problem in the pistons and you will have to remove them, clean them, and clean its seals. This is an operation that’s best left in the hands of a professional.
Brake hoses
The hoses are tasked with carrying the brake fluid to the calipers. They are flexible rubber tubes, but there are also metal ones which provide greater durability and a better braking feel.
The same as calipers, their useful life is very high, and you should only replace them when we notice obvious signs of ageing, like the appearance of cracks or excessive stiffness.

Changing them is very simple. The first step is to empty the fluid from the circuit with a syringe starting with the reservoir. Second, we will loosen the fitting or bolt from the lower part to finish draining the fluid that may remain in the hose, and you have to take special care in this operation that the fluid does not drip on any part of the bike. Thirdly, we will loosen any brackets to which the tube is attached and we will remove the fitting from the upper part. When installing new hoses, it is important that the copper washers go on both ends of the bolt to prevent leaking. After these simple steps, all that remains is to bleed the system so that the fluid returns to the circuit and the motorbike brakes again.
Brake pump and reservoir
These two elements are located alongside the lever and the pedal and, depending on the force we exert on them, it will change the fluid pressure that is found in the circuit. The more force we exert, the more fluid level we push, increasing the pressure and therefore the braking power.
We can operate the pump axially or radially and the only difference between both is that the former transmit the force in a crosswise direction and the latter in the same direction that we exert it. This latter system is the most common in sports bikes.They don’t require maintenance beyond cleaning and the change of fluid when required.

Brake levers
This is the part of a motorbike’s brakes in which we exert our pressure directly and the pump operates. They can be fixed, without the possibility of adjustment, or use a regulator that allows us to adjust the distance to our hand. They don’t require more maintenance other than greasing the axle from time to time and replacing them if we have fallen.
As the lever operates the brake light switch, we must ensure it is working correctly and thus be able to warn other drivers when slowing down our driving speed.
Drum brakes
If your motorbike has drum brakes, you must know that, unlike discs, calipers, and pads, your brakes have a drum, with its shoes inside and the cam or cams that operate them, and which, sometimes, its control, instead of hydraulic, is mechanical with rods to operate it.

For their maintenance, you only have to be aware of the wear indicator that they usually have on the exterior, as well as adjust the cable when necessary. If you see that they have reached the end of their useful life, it will be necessary to loosen the tyre and open the drum to replace the shoes. Depending on the model, this operation can prove to be be more or less laborious.
Now we’ve explained to you how the braking system of a motorbike works, what its characteristics are, the models, and its components. We have also told you about its maintenance, cleaning, and the replacement of worn or damaged parts. And, of course, we want to highlight the need to always have them in proper condition. As always, if you’re ever unsure, consult a professional.
Your safety and that of your passengers depends on it!